Monday 19 December 2016

Lesson 5 - scale furniture - Study Task

Creating scale furniture

Shezlong

Bookcase


Rococo Armchair
The example to the right is a template of the rococo armchair. I obtained this template from David Neat. The construction of this piece is much the same as the construction of the shezong. To construct this piece of furniture I would first shrink down the image to the correct scale before printing it out and spray mounting it to foamed PVC. I would use foamed PVC due to its toughness and and ability to maintain its shape without fraying even when the individual pieces are fairly small, such as the arms and front legs. Mount board would be too floppy and weak. 
After cutting out the pieces I would trace down the seat of the armchair on KAPA line foam board. The KAPA line foam board will serve as the cushioning for the chair. One the KAPA Line has been glued and sanded to the correct dimensions I would glue the seat to the back of the chair. Following this, I would trace around the back of the chair with the foam cushioning for the seat being flush against the side. This is to ensure that once cut, the cushioning for the back will sit nicely on top of the cushioning for the seat.
After this step has been completed it is time to add the front legs and the arm rests. The legs should be added at the same angle either side for symmetry and a more natural looking chair. Additionally, the arms should jut out slightly. 


Bed
- Version 1

This bed was created using modeling wire, mount board, fabric, KAPAline foam board and a glue gun. The first step is to create two basic frames out of a length of modelling wire. This is most clearly seen in RI1. When creating the frame it is easiest to create the curve first and then glue in the bottom rung. The bottom rung is what the mount board will be glued to. Once this has been created individual sections can be added on for additional detail. Once you have two frames, a piece of mount board is cut to the correct dimensions and is glued between them. This gives the bed the basic shape.
You are now ready to start creating the mattress and pillows. The mattress is simple a section of KAPAline that has had its edges sanded down to give it a slight curve. The pillows follow the same process but with a much greater curve and a much smaller size. The bed is then covered with a material of your choosing.
Top Tip! When creating furniture it is often much better to create combined legs rather than attempting to stick on individual ones!
Reference Image 2

Reference Image 1.
- Version 2
Another way I have found to make a bed makes use of KAPAline foamboard, tissue paper and mountboard. A range of different headboards are easily swapped in but I decided on a quick triangular one to keep the set simple. One problem with the example below is that i failed to take the width of the KAPAline into consideration. This meant that both the toe and head board come off as slightly more unnatural looking.
To create the bed, the legs and base are cut out first. The shape of the base is traced onto some KAPAline, which is then cut out and sanded down to size. The pillows are cut out to the required dimensions and are once again sanded down to size.

Lesson 3 + 4 - Painting and texturing - Study Tasks - 11/11/16

Study Task - Using sample pieces as examples, describe how you could apply these modelling materials and techniques to create surfaces and textures on a model.
Include - Foliage, Soil, Rocks, Concrete, Gravel, Tiling, Brickwork, Stonework, Paving and Wooden Planking

Techniques and Effects

Cut Paper Method
This method is the cutting up and overlapping or spacing of ticket card to create textures similar to wooden planks and tiles. It can also be used to represent brickwork. This can then be painted to achieve different effects, such as wood, marble and brick. The model box for for Trifles is a great example of this as Andrea Grutzner has used this method to create a wooden cabin. For this set she was aiming to create a dark, realistic and masculine set. This is immediately seen in her choice of colours and composition. In this example, she overlaps card to give the impression of wooden planking, which she then paints using darker colours to create gloomy tones. In my own example above I attempted to recreate tiling, wood flooring and paneling. I opted to leave the balsa wood flooring unpainted because I felt that painting it would make it lose some of the living wooden quality. To the right is a reference picture of different tile types.

Scoring Method
The scoring method is the cutting into materials in order to reflect different textures. This method is perfect for materials such as balsa wood and mount board due to their thickness and soft qualities. It is usually used to create brickwork, flooring, tiles, and tongue and groove.
To the right are my own attempts to recreate tiling, brickwork and wooden flooring. I much preferred this method to the cut paper method because I think that the finished models come off as cleaner and generally more realistic. However, I do think I could have tried harder to recreate a good wooden colour for the flooring. The brick work is probably my favourite because of the texture and colouring. When creating them I simply cut into the mount board and balsa wood with my craft knife.
Trifles - Andrea used the scoring method to create her wooden panel flooring. This is preferred to the cut paper method has it gives a smoother finish.
Harry Potter - The Harry Potter example has made use of this method for both the grass and the towers. I think that this works especially well for the towers because it gives them a more rustic feel. The designer may have used balsa wood to give the towers an added "living" quality.
For the grass the designer opted for the scoring cut paper method. This may have been to demonstrate how clean and neat the field looked. However, I think that this makes the model come off as a little unnatural.
Carving Method


The carving method is the cutting into KAPAline foamboard to create different textures, such as brickwork, tiling and rock. The above shows examples of brickwork and stonework. When painting the brickwork I mixed red and brown acrylic paint to get a slightly diriter and darker red. To create the indentation I ran my craft knife at a slight angle all the way across the wall and then again with the opposing angle.
When creating the rock face I compiled some reference images to work off and then tried to copy the same formations. This was once again acheived by using the craft knife at an angle. One area I think I didn't perform too well in was the colouring. In hindsight I should have used more brown in order to get a dirtier, more natural rock colour.
Scatter Materials

Grass
- Mixed herbs, oats, sand, dyed sawdust, fine cork
I'm reasonably pleased with how my grass turned out as I feel like they are accurate representations of grass. However, if I were to create additional examples I would try a greater range of colours as I have mostly stuck to the same basic colour. I also didn't use any mixed herbs and my work suffers a bit from this.
Concrete
- Sand, cork & polyfilla, gravel, sesame seeds
I am probably the least pleased with the concrete work as I feel like there is little variation between the different textures. If I were to revisit the texturing I would like to experiment with smoother materials.
Earth
- oats, dyed sawdust, sugar and sand, fine cork & polyfilla, vermiculite
I am most pleased with my earth examples as they show the most variety in bth colour and texture.
Snow
Sand, sugar
Vermiculite

Top Tip! sugar dissolves in polyfilla, which cracks and gives a great cracked concrete effect. Unfortunately, my attempt to do this yielded poor results.

Harry Potter - Although this example did not use scatter materials, I think that it provides a good example of a set where scatter matierials would be better suited.

Polyfilla
Polyfilla is used on its own or in conjunction with scatter materials to create textures with more depth, like rocks, concrete and earth. When combined with sugar, the sugar has a tendency to crack, which creates a nice, broken surface that is perfect for ice or split concrete.

 1) Trifles - Andrea Grutzner

Image result for harry potter set model 2) Harry Potter, Quidditch Field - Stuart Craig


Study Task 2

Q1: Why do we need texture on a model?
The primary use of a set model is a communication tool. The added texture means that more information can be obtained by the different disciplines.
For example, scenic artists may look at the different techniques they will need to use in order to achieve the desired effects.
Set builders are able to look at any three dimensional formations they may need to create, such as rockfaces and brick walls.
Stage Managers. Snow.  Health and safety?
Q2: How can paint effects and the selection of colour aid a model?
Shadows? Atmosphere? Lighting?
Q3: Find an example of a successful model and explain why.
This is a set model created by Beth Tearle and designed by -insert-. I find this to be a great example of a set model as it is a realistic depiction of what the final set will look like. It is to the correct scale and includes texture, colours, and spacing. This means that is a valuble tool to several disciplines as listed below.
Scenic Constructors
The construction team are able to see exacly what the set consists of. This will help them decide on the materials they'll use and the way these materials will be put together. For example, they'll be able to see that people sit upon the stairs. This means that they'll get the look of the piece correct while also knowing that it needs to be structually secure enough to be climbed and sat on.
Scenic Artists
Scenic artists can immediately
Stage Managers
A stage manager could look at this and see that actors will be working at height at points during the performance and so will be able to risk asses accordingly.
Costume Department
The designer has already started to include basic costumes
Actors
This is the first time the actors will be able to see the space they'll inhabit during the performance. It could help give them faith in the design time and the production. Additionally, it could help tone/atmosphere of the piece and affect how they perform.

Q4: Find an example of a flawed model and explain why.
A Doll's House
This is a model box I created for a basic set design for a touring production of 'A Doll's House'. It also happens to be a prime example of what not to do when creating a set model box. The reasons for this are as follows:
  • Lack of colour amd texture
The lack of colour means that scenic artists are not able to see the designs I want and are not able to directly transfer the design to the actual set. There are a few basic designs on the flats but these are crude and should the scenic artist choose to follow these, the set itself will come out looking clunky and rough.
  • Inaccurate Scale
One of the most important things a set model needs to get right is the scale. An inaccurate scale means that scenic constructors will not be able to get the measurements they need and there is a much greater risk of a piece not being to the correct measurements. However, This is not a major issue with this particular set as I did try to get everything (excluding the Christmas tree) to roughly 1:25 scale. Starting out with immediate accuracy is a good way to ensure that the finished comes out looking natural and is a more effecting communication tool.
  • Lack of set dressing
The almost total disregard to set dressing means that the model comes off as plain and uninhabited. Actors will not be able to see the type of set they will inhabit during a performance and so will not have the chance to alter the way they play their characters. This may cause them to lose faith in the designer and possibly the entire production.

In conclusion, this is a travesty of a set model because the model maker utterly failed to include almost all of the aspects that make a model a good communication tool. It is bland and only conveys some of the simplest ideas. However, it may have some use as an early sketch model as it would reasonably quick to produce and would show the director the designer's early ideas.

Constructing a scale door - 25/11/16

Process of Constructing a 1:25 Scale Door


Marking Out - Lesson 6

Step 1 - Centre Line
The first step to creating a 1:25 scale door is to find the centre point and draw a line running vertically up the mount board. Your centre line will be a vital component throughout the construction of the door as it will be what you take all your measurements from. Then measure 6000 mm up either side of the mount board and draw a line that connects them. The space underneath this line is where you shall begin to mark out your door.
Step 2 - Door
This is the marking out of the door itself. First, the width of the door is measured and two vertical lines are drawn to the required door width, both being equal distances from the centre line. The height is measured from the floor to the base of the door. This is where your door begins. Steps will be added during the building phase. The top of the door is then added. My door was slightly different so I had to construct a set of treads and mark out my door to those dimensions.
Top Tip! Most doors are 200 - 205 cm in height and it is wise to stick between these measurements.
Step 3 - Frame
The width of the frame is measured and added in a similar style to the door. If you find that the width of the frame differs slightly on either side then it is easier to just pick one measurement and stick to it.
Step 4- Steps
On the mount board this step is the marking out of where each step begins and ends.
To create the treads I followed a basic template given in an earlier lesson. In my opinion, the steps I made were not to the best of my ability, but I feel that I was able to get away to it thanks to filler materials, texturing and the fact that my door wasn't very even anyway. In the future I will take my time more to get everything the way it should be.
Step 5 - Windows
The windows are drawn out using the centre line and other structers as a
Step 6 - Tabs (1 x 4 m) & Supports
Top tip! It is idea to have three triangular support braces for each tab.
Step 7 Recesses
Recesses are what separates us from children. They help give the model depth. I measured out a 30 cm recess because I thought it best fit the picture I was given of the door. When measuring out the recess, you will need two side pieces and a header. The header should be the width of the door + a 80 mm overhang, which will allow it to sit on top of the two side pieces. A picture of how it comes together will be shown below.
Side note! When marking out my door I opted to also mark in my overhang. This wasn't necessary but I did it anyway to give myself it's positioning later on when it came to create and place my overhang.

Cutting - Lesson 7
This lesson was focused on the cutting out of the individual parts. Unfortunately I was a bit forgetful and didn't take many pictures. Although this step is time consuming and tricky, it's fairly straight forward.


Cut windows first.
Top Tip! When cutting out curved or intricate bits it is a good idea to make practice cuts first in order to get used to the methods and procedures.

Then door.

Then Frame. Although it is drawn all the way to the bottom, your frame should only be cut to the base of the door. The frame should hopefully sit on the later constructed flooring or steps.

Then tabs and centre piece.

Then braces.

Then Recesses.


Building, painting and texturing - Lesson 8
This lesson was focused on the building of the actual door,

The first thing the model maker does is create the recess. It is of the utmost importance that all the measurements and cutting is correct because if either are off then your door will not come together perfectly. Nobody wants a wonky door. The two side recesses are the first pieces to be glued in place. Once these are secure the head is added. Once these are in place the frame is glued into the gap. This step is incredibly important because if it was done incorrectly then the door would no longer fit. Once this step is complete, a floor is quickly marked out, cut and glued into position.

In the picture my door is depicted as having an overhang. To create it I opted to use KAPAline foam board because it already had a suitable thickness and could be sanded to any shape. To get the thickness on the top I decided on mount board, and for the thickness on the bottom I used ticket card. I knew that it would have to cover a person as they stood outside so I decided on having my overhang at a 60 cm length. When it came to the width I simply measured out the overhang on the picture and transferred the information. To create the curve on the overhang I measured 5 cm less on length and 10 cm less on width, on some ticket card and sanded down the KAPAline. I then glued the three different components together and did some more sanding to make sure everything lined up.
To create the two supports I cut out two more pieces of KAPAline, added some ticket card and sanded in a curve. Unfortunately, once again I was quite silly and forgot to take pictures.

The other thing to do is to glue on the tabs and braces. It is particularly important for the bottom brace to be absolutely flush because it is what anchors the door to the base. If the triangular braces were cut accurately then the tabs should naturally go to a right angle. If the braces were not cut accurately then you have bigger problems.
My door had a tiny ridge along the outside of the window. To transfer this ridge over to the model, I measured out the window on some ticket card and then carefully cut a ring out of it. This was then added to the door. Unfortunately I didn't take any pictures of this but the ridge can be seen on the image of the door posted below. You are now a able to start painting your door.
Textures!
My wall didn't have much texture so all that was needed was to coat the walls in a very thin layer of polyfilla to to give it that tiny bit of texture and make it appear less perfectly smooth. I made a mistake here and coated the floor of the recess in polyfilla, which made the door in unable to fit as smoothly as it did. This cost me some valuable minutes as I had to scrape off the mixture with a craft knife. However, it did end up working in my favour as there is now some messy texture on the floor that wouldn't have been there otherwise. One part I am particularly proud of is my initial colour matching of the paint on the walls. I later lost a tiny bit of accuracy after I wiped on some dirty water to give the model a dirtier, more weathered look. To create the horizontal marks above the door I simply layered up some polyfilla and ran a plastic brush through it a few times. The floor wasn't visible so I chose a tarmac floor to keep with the already depressing aura of the door. To achieve this look I used the scatter method and coated the floor in PVA glue before adding an incredibly dark grey paint.

I am pretty proud of the door but do feel that I could have spent slightly longer on getting the colours to match more. To create the door I first coated it in a green paint. In end I think that my door is too bright to be what I wanted so if I were to repeat the project I would spend longer on getting matching tones. To get the tearing, broken quality I waited for the green paint to dry slightly before running my knife down it and tearing away the paint. I then dipped my brush in a very watered down dirty brown colour and dabbed at the torn away areas. This is probably my favourite part of the model just because I think it looks quite cool. 
The last few things to do before the final texturing is the placing of acetate as glass, hinging on the door, gluing the stairs and model to the base, and the adding of any more tiny details, like a door handle, writing or a door bell. To create the window, I marked out the size of the gap onto acetate, cut it out and glued it to the back of the door. The same thing was done for the planks on the window of the door itself. I think I was fairly fortunate here as my door was supposed appear dirty and I didn't have to worry too much about cleaning or being precise in certain areas. The door handle is simply a painted bead that was glued on. One thing I regret not doing is writing on the door number because it would have been really easy to do that increased realism and detail. The hinging of the door is a fairly straight forward process. All that is needed is a strip of masking tape and some PVA glue. To hinge the door a small amount of PVA is placed on the edge of the door, the frame and the back of the recess. The tape is cut down to size and placed on the glue on the door. The door is then put into position and the tape is smoothed over the rest of the glue.
Top Tip! Little beads make perfect door handles and flowers. 

Finally, all that remains to do is to add more texture to the base and overhang.
I wanted to give the impression of scattered debris and gravel. In order to get this effect I again used the scatter method. I placed pools of PVA glue and scattered mixed herbs into them. When it came to painting the debris I went haphazardly because I quite liked the uneveness of the paint as I feel it comes off as more varied and has a better aesthetic. 

Evaluation


Friday 28 October 2016

Lesson 2 - Model Making Materials - 20/10/16

Study Task 1 

What materials are used?
What are the pros and cons of each one?
Why would you choose one over the other?


Things to consider

Cost. Time Effectiveness. Shaped or Cut appropriately. How easy they can be joined or bonded. Can they be painted? Is it durable if model box is meant to last

Mountboard

Mount board is strong and easily cut in addition to also being fairly cheap and is useful for the main construction. The model maker would consider using it for walls, rostra, treads and furniture. It can be cut with a basic utility knife and thicknesses up to 6 mm are fairly easy to work with. The downside to mountboard is that some paints may cause the board to warp and it is not good for detailed or intricate work as it will start coming apart. It can be stuck with PVA glue.

Foamed PVC
Foamed PVC is a lightweight plastic most commonly used in architecture. It is sometimes used by designers for exhibitions. Its strength and rigidity mean that it is great for intricate and detailed work. Additionally, it is also easy to cut and any rough edges can be sanded down. As it is a plastic, it is naturally resistant to warping, the downside to this is that it also resists paint unless a primer is added beforehand. Foamed PVC is also much more expensive than mountboard. 
KAPA Line Foamboard
KAPA Line Foam board is a brand of foam-board that can be peeled to reveal a foam core, which can then be carved, cut and imprinted on. This makes it well suited to acting as walls and padding, It can be up to 10 mm thick.
The negative side to KAPA Line Foamboard is that it is very costly.
Foamboard
Foamboard consists of rigid polystyrene core with a sheet of tough paper on either side. It is mostly used for the theatre box or larger structures. Though cheaper than KAPA line, aerosol paints and solvent based adhesives will cause the inner polystyrene core to disintegrate.
Styrofoam - Extruded Polystyrene
Another form of styrene that is much more dense than the regular polystyrene used in packaging. It is lightweight, comes in multiple variants and is especially good for modelling rocks and other landscaping features.
The problem with Styrofoam is that only water based adhesives and paints should be used, as solvents like acetone will attack the foam and once again cause it to dissolve. It is most easily cut and shaped using either a very sharp knife or a hot wire.
Stencil Paper
At £2.50 - £4.50, Stencil paper is expensive but is perfect for intricate work. A coating of linseed oil means that water isn't absorbed, which means that it has an increased working life. It also means that stencil paper is more able to resist warping. In modelling stencil paper is used for slightly raised surfaces that are too thin for mountboard, like window panes, boards and archways. Its strength means that it works well for curved work.
Ticket Card
On the other hand, ticket card is much weaker and more susceptible to warping but is far cheaper (2p a sheet!) and can still be used for many of the same purposes. It is especially good for raised surfaces like skirting and certain kinds of paving
Speciality Papers
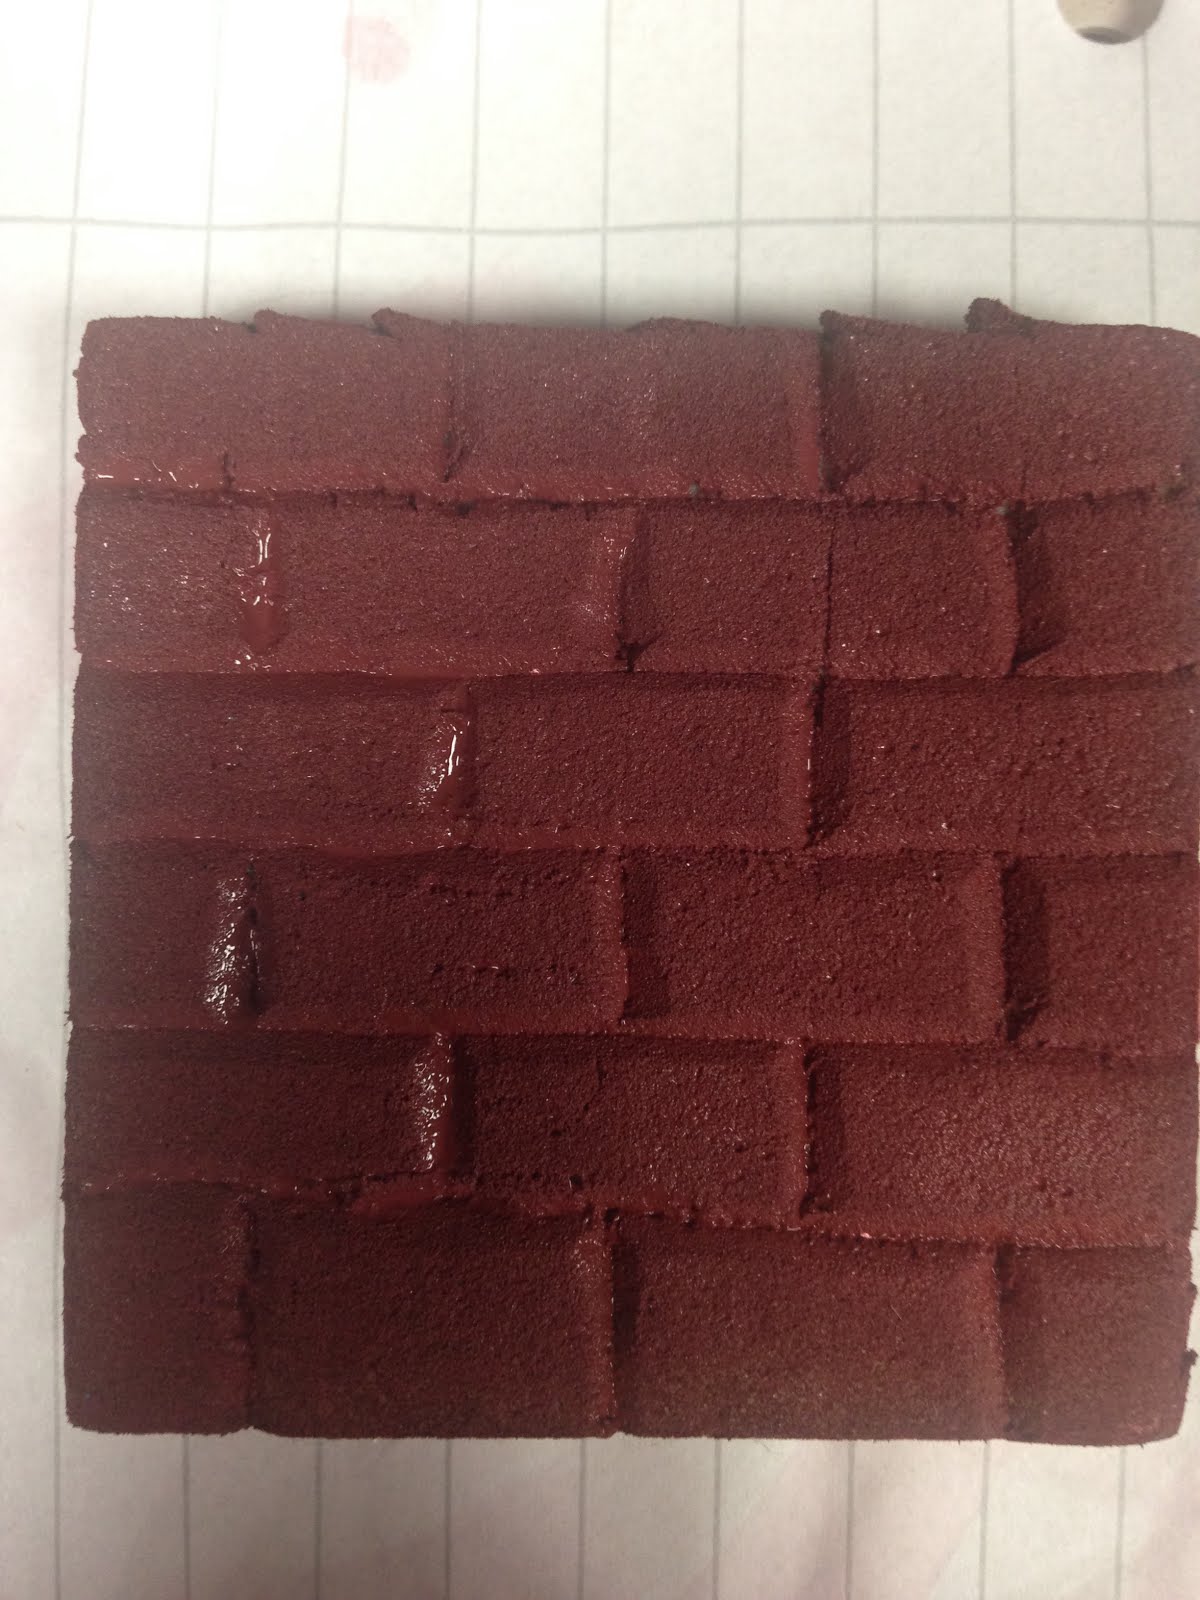
Speciality papers are papers with designs or textures pre loaded on them. They can provide the basis for flooring and heavily textured walls. The modeler would use them when they want to a quick way to accurately depict real life textures. They come in a variety of different sizes and thicknesses for a range of different functions. Corrugated paper can also be sourced to represent roofing or corrugated iron. One thing to look out for is the scale as many speciality papers come in a 1:24 scale instead of 1:25.
Tissue Paper
Tissue paper is used mainly used for replicating fabrics and clothes that can then be used as part of the set or for any model people. If PVA glue is added to the tissue paper then it can also be used to cover metal framework and create texture and added thickness
Acetate Sheeting
Acetate is a clear material that is perfect for windows and car windscreens. If there is a projection within the show, acetate can also be printed on to depict this. In addition to this, acetate can be painted or sprayed to give it a variety of textures, like stained or frosted, depending on where the play is set and what is required.

----------

Balsa Wood

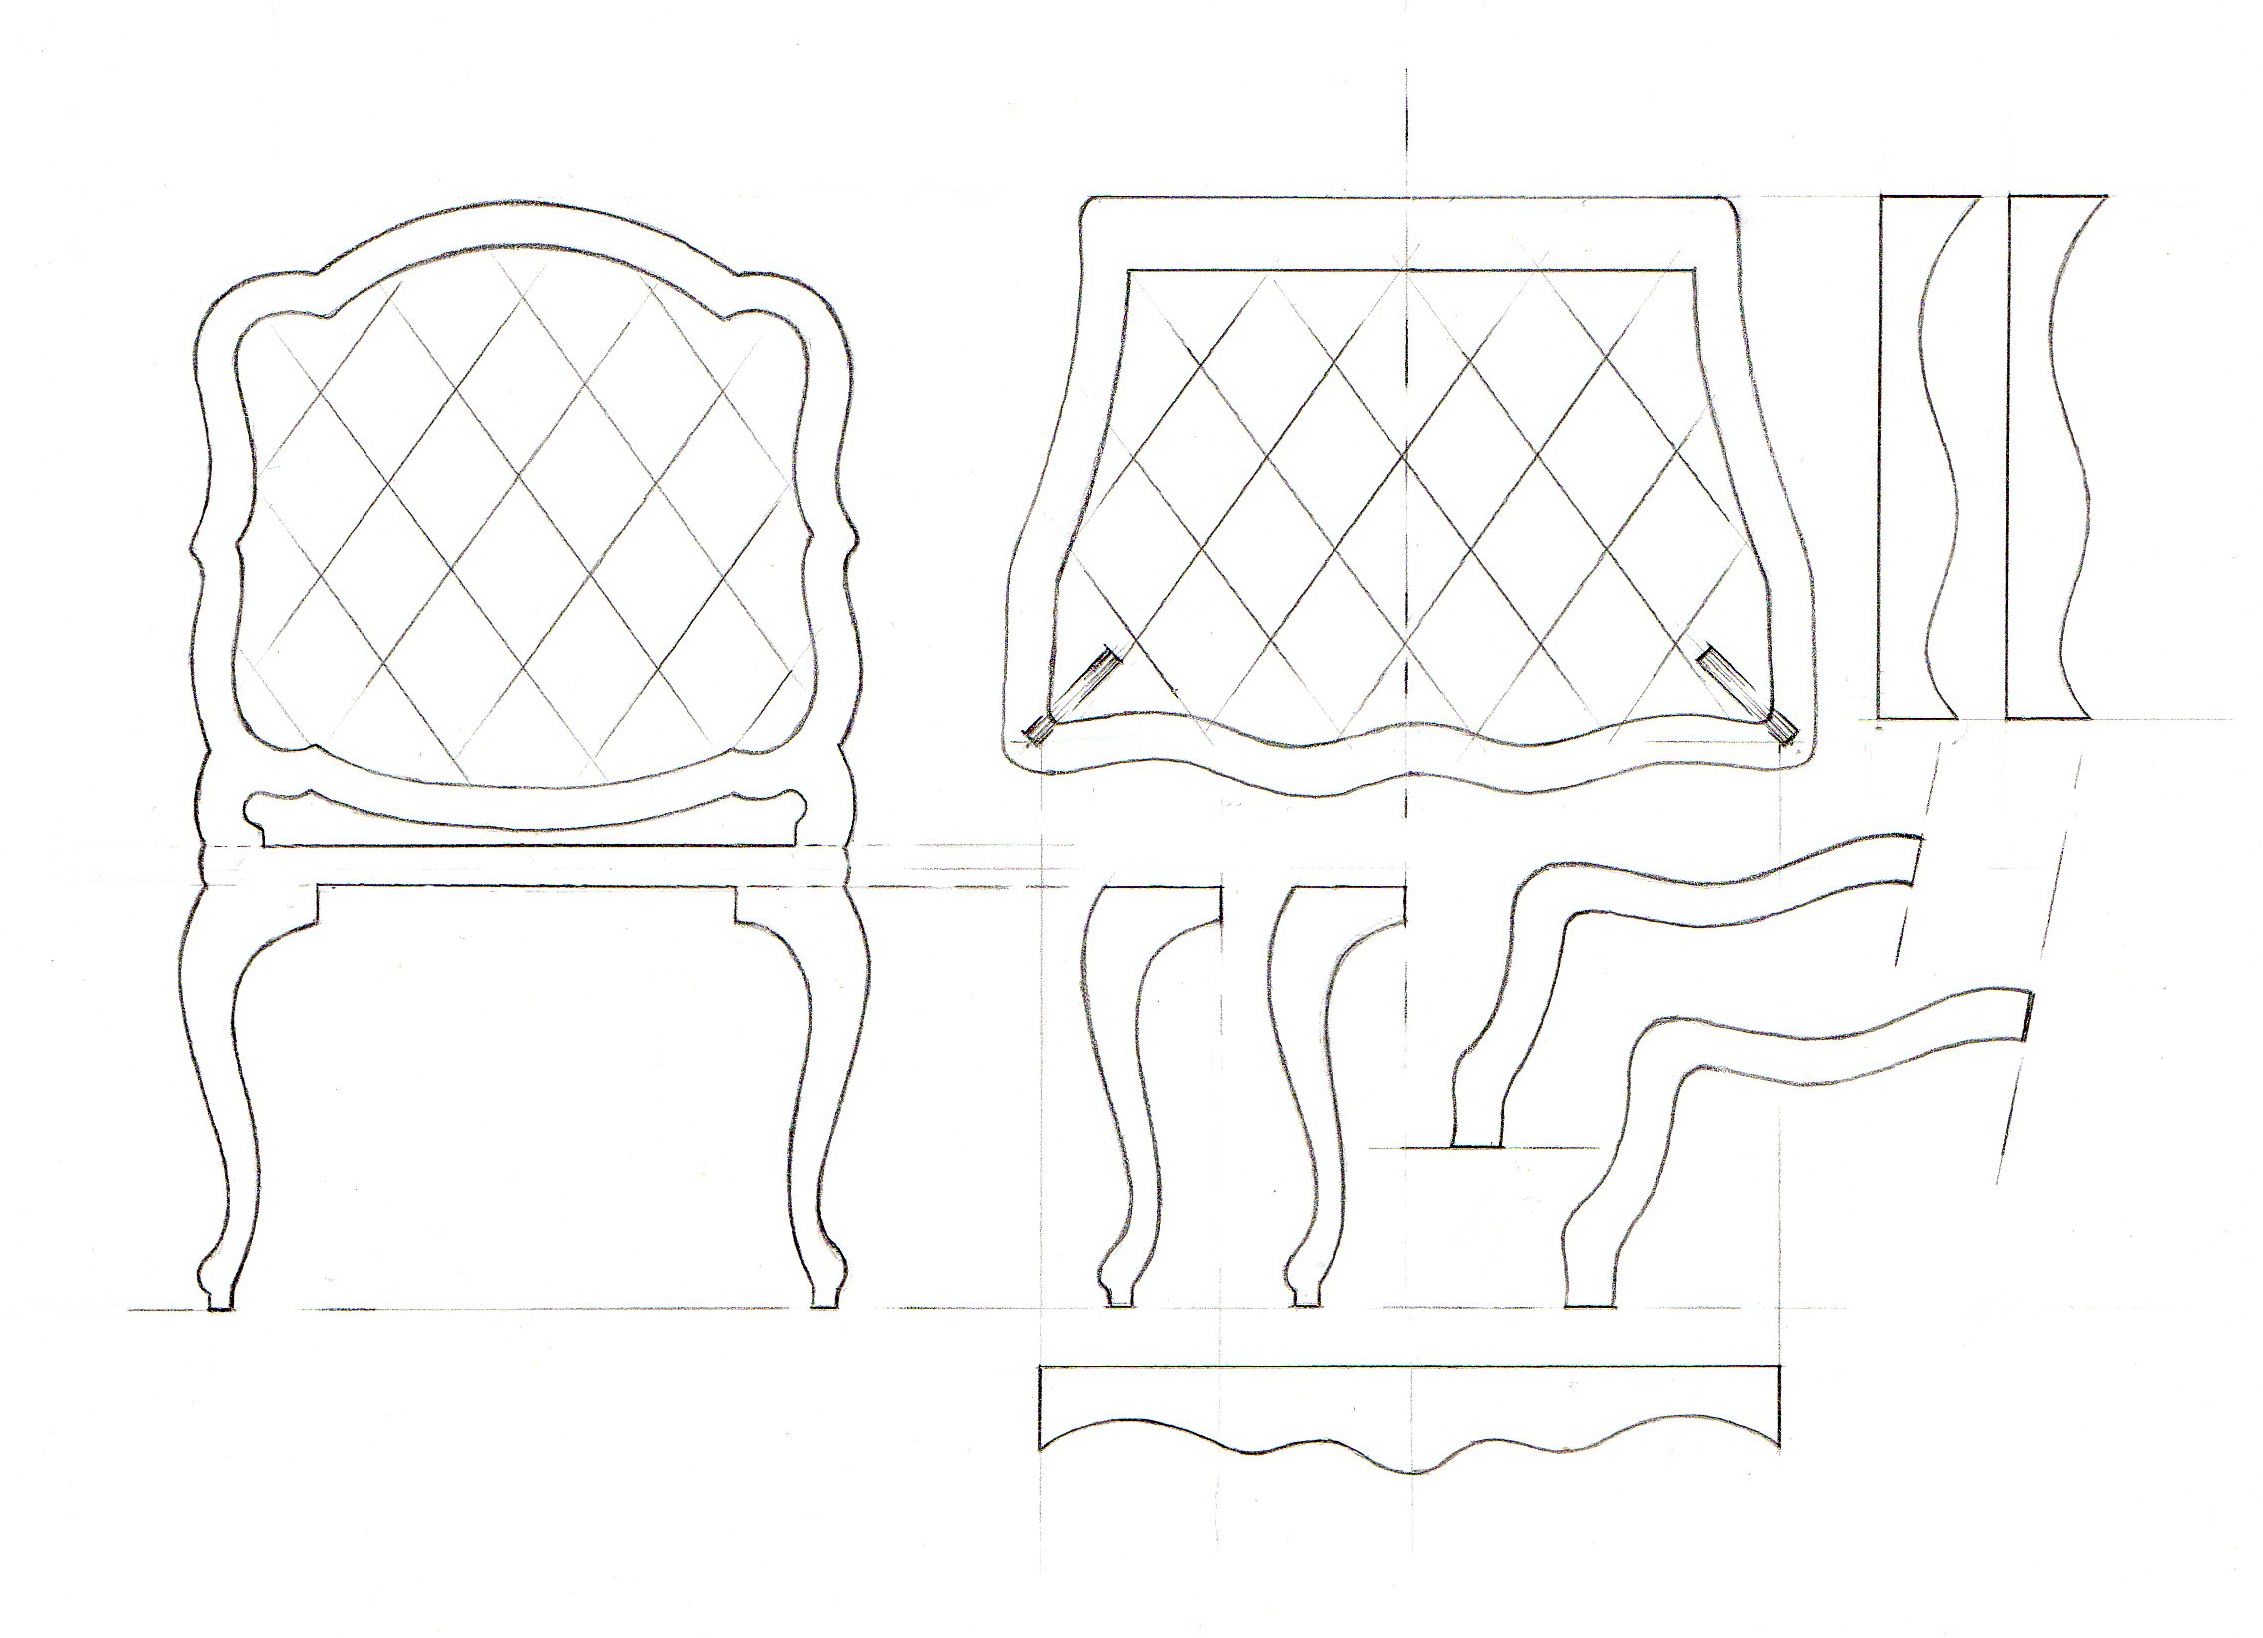
Balsa wood is soft, easy to cut and can be glued easily. It's softness means that it can be carved easily and a good amount of detail can be included, while its texture means that a living component can be added to the model. Modelers often use it to create rustic furniture, gates, planks and fences, and to represent woodwork. The sticks of balsa wood are ideal for creating fly bars.
Its light weight and strength means that it is commonly used for flying models. The downside to using balsa wood is that it is very expensive and mistakes are not easily undone.
Lolly Sticks, Kebab Skewers and Cocktail Sticks
These are heap alternatives to using balsa wood. Stuck and glued easily together. The downside being that they tend to be quite flimsy and don't have the same texture that balsa wood have. The modeler is also limited with the shapes and sizes of the materials. They would be most useful during the sketch model where the designer is able to explore ideas without having to worry so much about how it looks.
Styrene Rod, Sheet, Square and Section
Styrene is a flexible but rigid plastic that is well suited to modelling predetermined shapes and fine, delicate forms. Styrene rods are hollow and work well as pipes, guttering and girders. Using a selection of rods, sheets, squares and sections, the model maker is able to construct people, furniture and other objects. As it is PVC foamed only superglue should be used to join different components.
Thicker Sheet, Tube and Rod plastics
Thicker sheet, tube and rod plastics are largely used to create pillars and columns. They can be cut with a hacksaw quite easily and firmly joined if they are heated.
Brass or Copper Rods
Brass is an alloy of copper and zinc. It's shininess allows it to stand in for shining gold surfaces and its strength means that it is able to bear heavy loads. Brass pieces are joined together by soldering.
The modeler would use copper to create steam pipes, fuel lines and tanks.
Along with Brass, Copper is perfect for small, detailed work like fencing and fretwork. It is also ideal for metal framework furniture.
The negative side to using metals is that they can only be joined by soldering and require more specialist equipment.
Modelling Wire
Modelling wire is made of light weight aluminium and is easily shaped. It can be cut with snips or pliers and can be joined using a hot glue gun. Their biggest use lies in the making of model people, armatures and metal frames.
Florist Wire
Florist wire is much weaker than modelling wire and would only be used to create simple metal detail. It is cut using scissors and joined with a hot glue gun.
String, Thread and Fishing wire
String, thread and fishing wire are cheap and extremely maneuverable. String in particular can be very useful as it can immediately used as 1:25 scale rope. Thread is much thinner but comes in more vibrant colours and can be used to texture, as washing lines and to border. Fishing wire is very durable and tough. This makes it ideal for load bearing works.
Plastacine
Plastacine and plastiline are cheap alternatives to modelling clay that don't dry out and can be used multiple times. They're ideal for creating model props, food, textured walls/object and scale people. Once coated in PVA glue and primed painted they become quite durable and long lasting.


Model Maker's Handbook - Albert Jackson
ModelBuilding - Alexander Schilling

Neat, D. and Bärndal, A. (2008) Model-making: Materials and methods. United Kingdom: Crowood Press, Limited, The.
Class Handout
Pictures are a range of mine and ones from Google Images. Images can be changed if references are required. 

Study Task 2 - Sketch, White-card and Finished Models

Sketch Models
Sketch models are initial three dimensional drawings that the designer can use to explore different concepts and generate ideas. They are very rough outlines that do not need to be particularly in scale or an accurate representation of the final model set, which gives the designer to the opportunity to play play shape, proportion and scale, and look at the relationship between three dimensional objects. They are a free way for the designer to refine ideas, explore themes and look at different variations of designs. At this early stage it is unlikely that these will be seen by anyone other than the model maker, although the director may appreciate a glimse into what the designer is planning to do and so offer guidence or advice. Due to the speed at which they can be constructed, they are a good way to experiment with different designs as the model maker is not wasting any time by creating detailed models that will be declined, as well as presenting a good way for the designer to shoot through a range of designs very quickly.
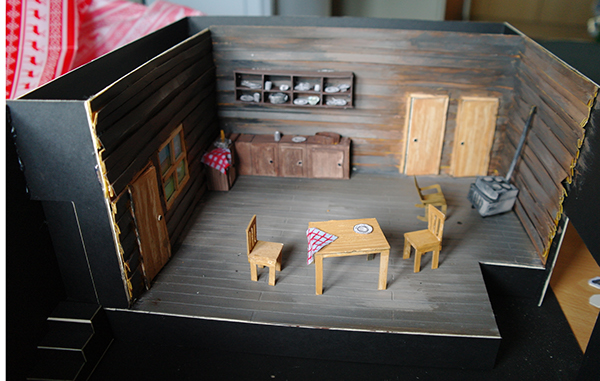
Sketch Model Me
To the right is an example of a sketch model that I made during class. It was used as an initial way of exploring the theme of 'ship wreck.' I count this model as fairly successful as it provided a way of generating simple ideas, like the ship, that I want to explore further. I also found that I didn't like the chest as much so that would probably be scrapped before I move on to white card models. Additionally, it gives the model maker a way to experiment with colour and texture. For instance, I quite liked the colour pallet and and the texture around the treads so I would keep them, whereas I didn't like the effect of the lentil seeds so I now know to scrap them.

The most significant downside of the model is my complete failure to cover everything with paint, which is most noticeable around the sails, This is not for want of trying. If I were to redo the model I would either try to paint a base and then include some of the more complicated scenography or use a form of spray paint to ensure that everything is covered. Furthermore, I would attempt to not create any dark tunnels that I have since found to be incredibly aggravating to paint. One of the instructions when creating the model was to have a slow transition from one colour to the next. This is something I could have improved on because although I did eventually get a smoother transition, much of my model is fairly haphazard, which I find to be a nice effect but are not to the guidelines given to us.
Overall, I would say that I am pleased with the model because I believe that it is exactly what a sketch model should be; a simple exploration tool to look at different techniques, colours and ideas. 
White Card Models
Image result for dumbledore's office white card modelThe white card model is the second kind of model box that the designer will create and is much more exact than the basic sketch model. The designer will often only move on to this stage when the designs have been settled on and there is no longer much need to experiment. It is still much rougher than finish scenograpgic models so that any changes can be implemented quickly and efficiently. It is a three dimensional blue print of the final set. It is all of the most essential information, namely space, structure and any movable elements. White-card models are used by technical crews to see how much space they have for equipment, and by scenic constructors to see what it is they are actually making and the dimensions they are making it to.
To the right is the sketch model for Dumbledore's office in the Harry Potter franchise. From this model the scene builders are able to take measurements and look at scale, shapes and composition. There is limited colour because it would be too time consuming to paint it all and then potentially change if it was not to the director's liking. This particular set does not contain any movavle elements so the set builders know not to worry. They would potentially look at the curved levels on the ground, the basin and the curves on the wall. They are also able to look at the stairs in the other building as well as the windows.

https://www.youtube.com/watch?v=yz0NvsIKPYE

Finished Scenographic Models
Finished scenographic models are the final version of what the set will look like. It is to scale and has been painted with the textures and colours that will be applied to the final set. They contain any set dressing the scene may contain. The components that the individual disciplines has already been discussed in the first post.
To the right is the set model for the third year production of 'They Shoot Horses, Don't They?' This production made use of a simple stage with two lines of lights leading from it. The only qualm I have with this set model is the fact that is it not immediately clear where the audience are seated. However as it is a touring piece this may have been intentional. From looking at this set model, colours and materials are immediately hinted at in addition to what lighting is already included. Set builders are quickly able to see that a fixed stage and a simple square frame needs to be created. A potential downside is that almost no set dressing is included so not much information can be obtained by the stage management team.

References

Neat, D. and Bärndal, A. (2008) Model-making: Materials and methods. United Kingdom: Crowood Press, Limited, The.
‘White card models’ for film/tv work (2012) Available at: https://davidneat.wordpress.com/methods/white-card-models-for-filmtv-work/ (Accessed: 30 November 2016).

Mills, C.B. (2000) Designing with models: A studio guide to making and using architectural design models. New York: John Wiley & Sons.

Lesson 1 - Introduction to scale and model making - 07/10/16


Image result for model box- 'Trifles'

Study Task  - Who uses model boxes?

Almost everyone as model boxes are a communication tool that allows information about the set to be spread quickly and efficiently through the different disciplines. The more detail a model box, the more exact

Directors
Directors will look at model boxes to see what kind of space they're working with. Accuracy and scale are particularly useful as it shows them if there are any limitations or problems they need to work around. If it is a touring piece, they may look at the different components of the set and how they'll need to be transported. Initial sketch boxes will also give them a chance to collaborate with the design team in order to create a final piece that is in line with their vision.

Production Manager
The production manager looks at model boxes to asses the production and looks at any health and safety related issues, e.g are actors working at height? Are there trap doors? Are there any heavy or sharp set pieces?
In addition to this, production managers may be able to look at how much the set will cost. Are they acting within budget?

Stage Managers
Stage managers would look at model boxes to get an idea of spacing and the rough size of the set. This allows them to mark out rehearsal rooms, plan entrances and exits. Additionally, if it is a touring show, it allows them to plan for transport and storage. Also allows them to see what the show actually is and so allows them to plan ahead, for example they will be able to plan for any projections. They may also look at how many things need to be switched around and what changes scene to scene. There is one sequence in the Woman in Black where a child's bedroom needs to be destroyed in secret while action takes place elsewhere. The SM has a three minute interval to pull the fly down, climb onto stage and wreck the room. In this instance the model box could be used to plan routes and timing.

Lighting Designers
Lighting designers can use model boxes use model boxes in a similar way to directors, using them to test out different lighting designs and locate any problem areas that may need additional lighting. They can look at what lighting fixtures are already included within the set and what the potential is for adding more. They may look at what the colours of the set are so they don't use colours on the other side of the colour wheel, for example, using red light on a blue set would make all the blue come out black. Additionally, they would also look at where the play takes place as they would light a kitchen and a forest very differently. If the set is open or has windows they may need to consider lighting the set in accordance with what the time is within the set.
In the 'Woman in Black' example below, the set has a wire mesh that splits the stage in two. In this instance, the lighting designer would need to take care with lighting so to not reveal up stage.

Scenic Artists
Scenic Artists would use model boxes to see the different textures, patterns, colours and techniques that need to be applied to the life size set. It is their job to transfer what they see on the model box to the set itself. For example, in the Woman in Black model box, the design uses a wire mesh painted to look like stormy skies. The scenic artist is able to use this as a reference point and know exactly what is wanted. It will give them a chance to plan out how they are going to go about painting the set.

Designers
Model boxes allow designers to plan out and experiment with themes and locations. They are able to make sure the set fits in with the director's artistic vision and the overall atmosphere of the play. From the initial sketch model to the final version, model boxes allow designers to explore different ideas and show what it is they are actually going to do. The different stages of model boxes mean that the designer is able to work with the disciplines from the very beginning in order to create a final piece in which all the different dramatic elements work together, Certain productions are very specific with what is required. For these plays the designer may want to use model boxes to see how the requirements can be realistically.

Scenic Construction
Model boxes show exactly what is wanted and is a tool that allows those in scenic construction to make more detailed plans. It gives them a better ideas of materials they need, how much they need to build (height and width), what they need to build; doors, tables. It also gives them an idea of what techniques they'll need to use like welding, carpentry. They will also be able to see if any part of the set or any work they do needs to be hidden. The more accurate the scale and measurements of the model box, the more information the set constructor is able to gain.

Actors
Model boxes are the first time the cast will see the space they'll be using. They'll be able to look at the style of the play and alter the way they perform their characters to fit it. It may also help to reassure them that the designer knows what it is they're doing.

Although hard to make out, this picture depicts the Harry Potter: The Cursed Child model box. In this model box the set designer has included wall lanterns (pictured below) and ceiling hangings. This instantly sets out the basic lighting and allows the lighting designer to plan additional lighting around this.


Need more visuals. 


In the title example of 'Trifles,' the designer wanted to create a realistic and dark depiction of a kitchen area. The director would be


http://www.bbc.co.uk/education/guides/z39x34j/revision/2
https://www.behance.net/gallery/15217479/Model-box
https://www.pottermore.com/news/cursed-child-set-design-christine-jones-interview
Model Making: Materials and Methods - book
The Woman in Black image was my own picture.

--------------------------------------------------------------------------------------------------------------

Introduction to model making - Lesson notes

Tools Used

Scalpel
Cutting mat
Foam board
Wood glue?
Metal ruler
Scale ruler

"Scale is the ratio between the size of something and the representation of it."
1:50 is the scale most commonly used by architects because of the grand scale of the buildings they work with. A smaller scale would mean that the model boxes would be huge themselves.
1:25 is the scale most used by scenographers because it is small enough to not be cumbersome while still big enough to show detail.
In this lesson we created flats, rostrums, treads and a ramp to scale. On the whole I think I did well at this task as all of my measurements were to the exact specifications of the design plan. However, some of my edges came away a little rough or a little off either because I (regrettably) used the wrong side of the scalpel or I moved too quickly and did not stay in line with the metal ruler. However, as I grew more confident and had practice, I began to improve and my work became more exact. If I were to repeat the exercise I would move more slowly when cutting the shapes out.
Overall, I really enjoyed the lesson and thought it was a great introduction to making model boxes, I just need to learn to take my time when working. In addition, when looking back over my model boxes I noticed that not all pieces went perfectly together, with one gap over over a millimeter and one piece on my treads being a little lose. Once again I think this was due to cutting out too quickly.