Shezlong


Rococo Armchair
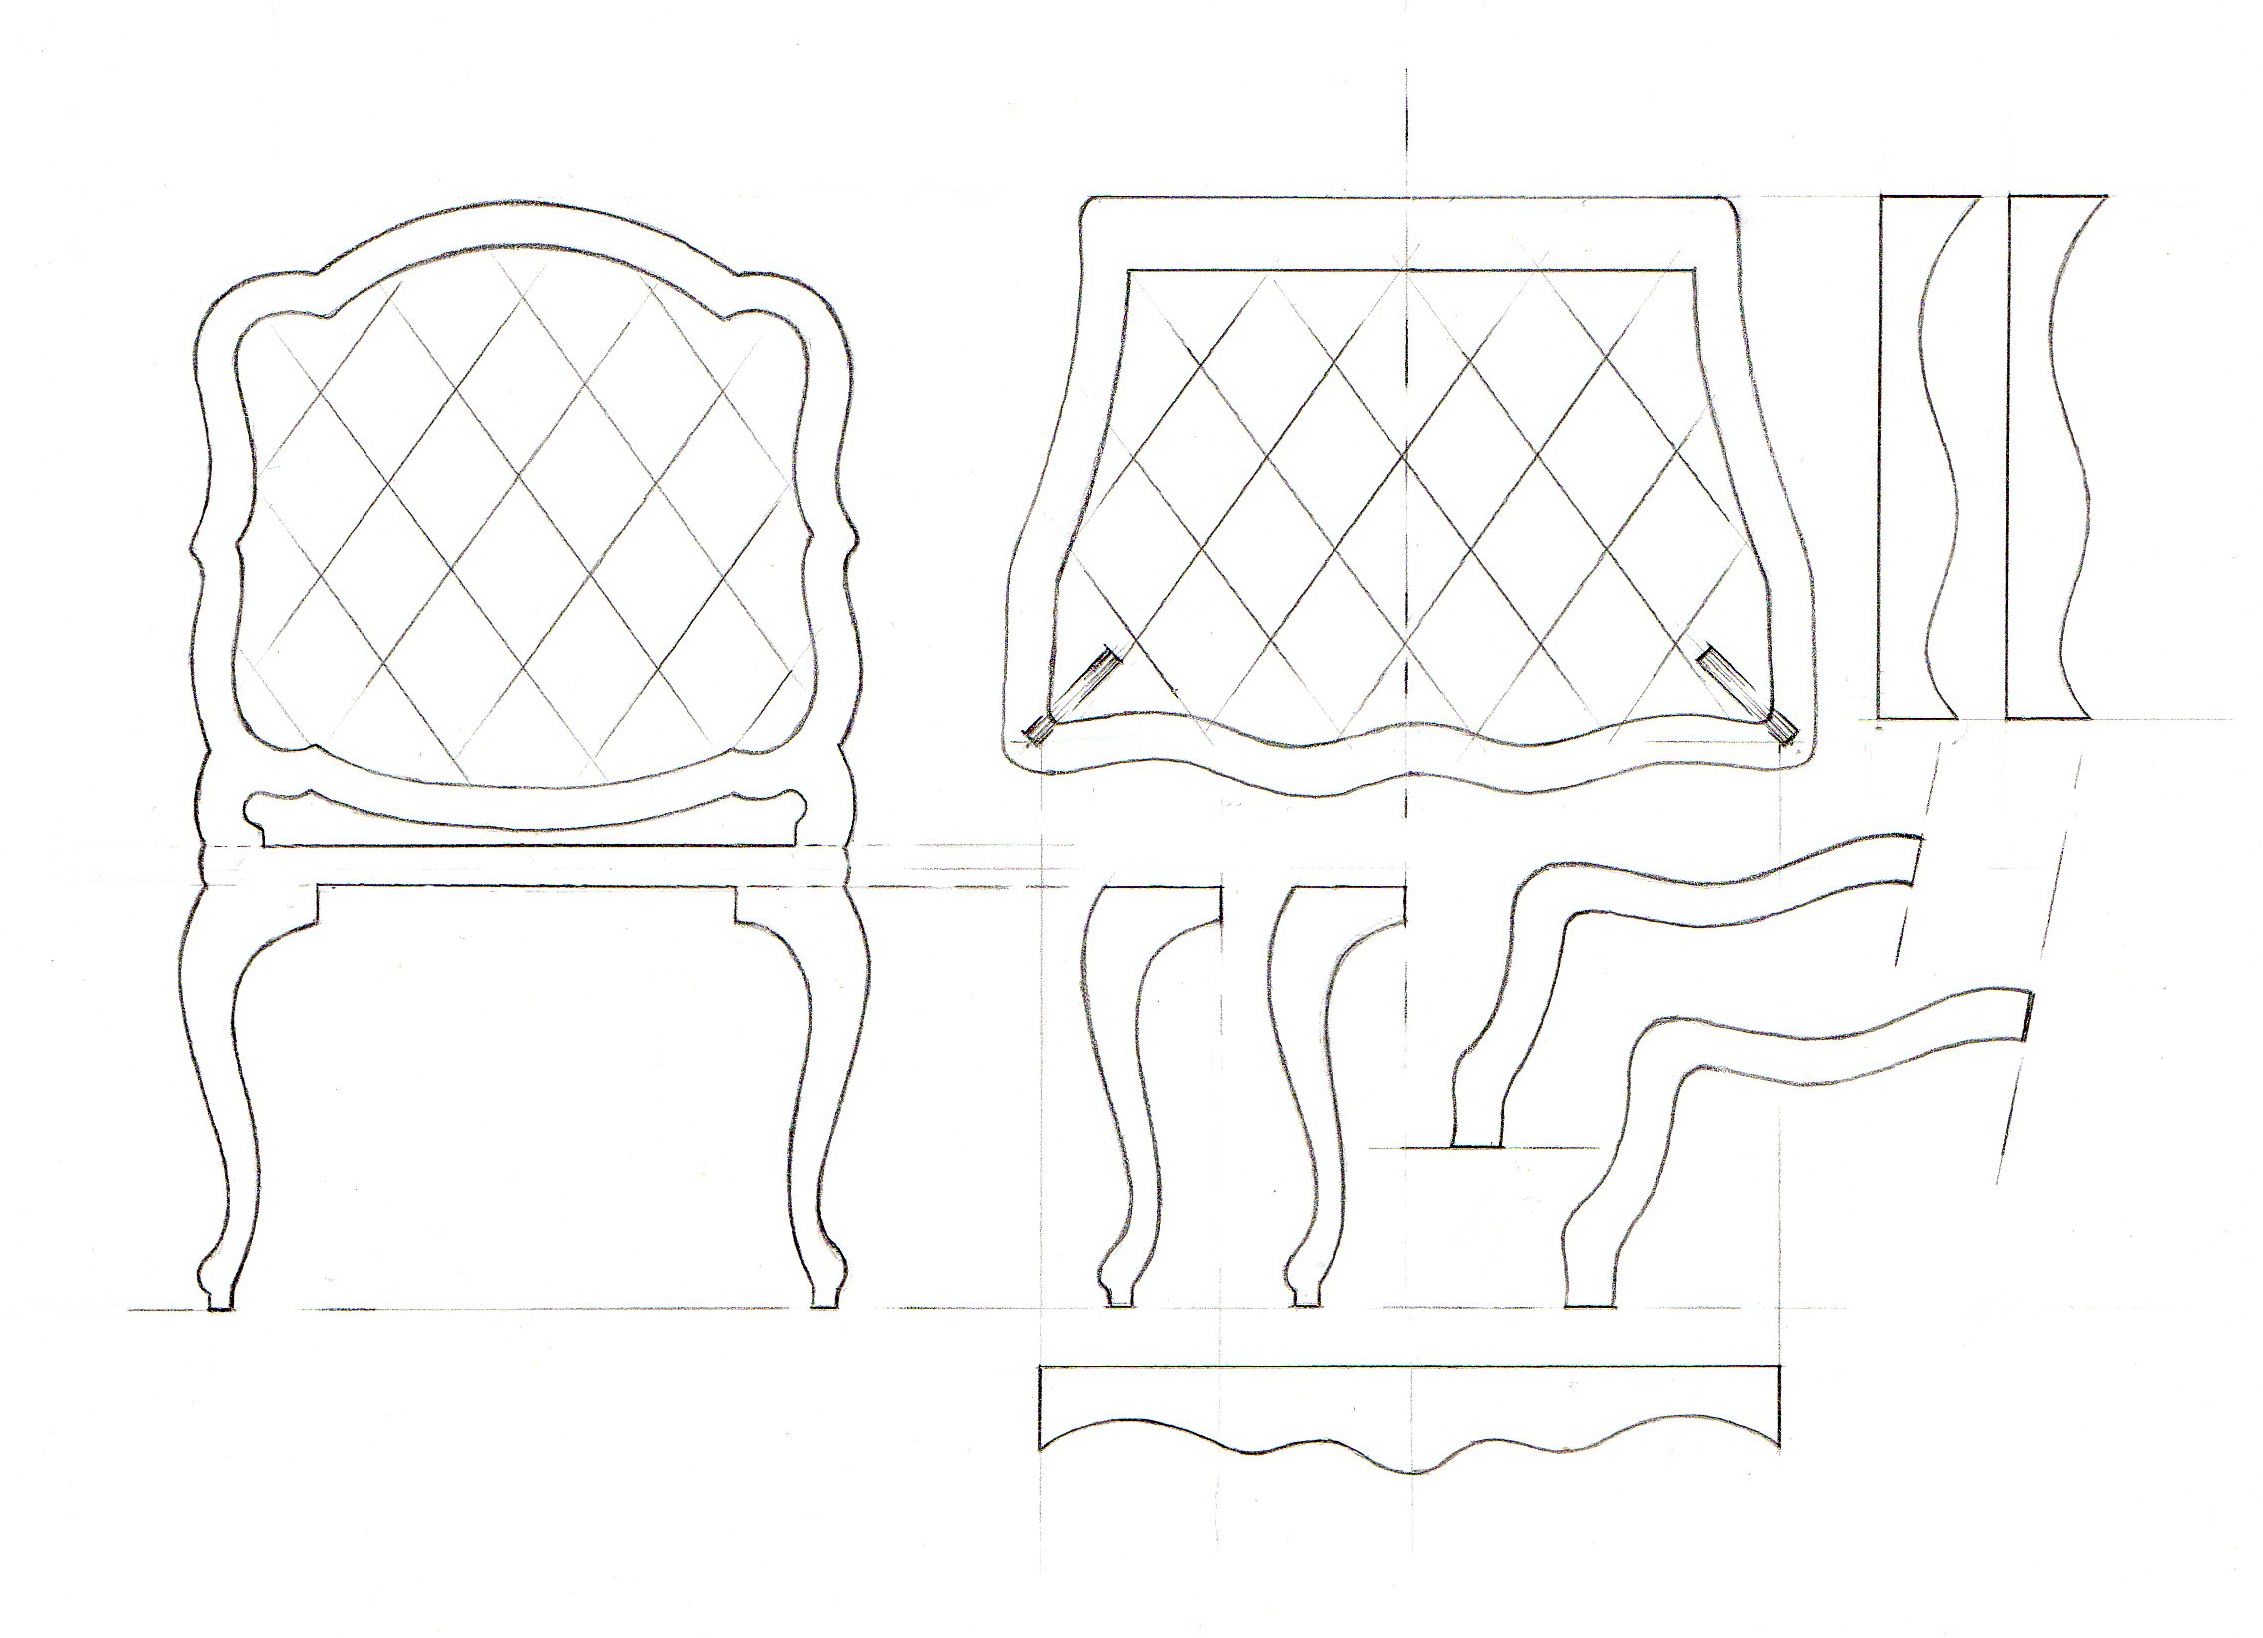
After cutting out the pieces I would trace down the seat of the armchair on KAPA line foam board. The KAPA line foam board will serve as the cushioning for the chair. One the KAPA Line has been glued and sanded to the correct dimensions I would glue the seat to the back of the chair. Following this, I would trace around the back of the chair with the foam cushioning for the seat being flush against the side. This is to ensure that once cut, the cushioning for the back will sit nicely on top of the cushioning for the seat.
After this step has been completed it is time to add the front legs and the arm rests. The legs should be added at the same angle either side for symmetry and a more natural looking chair. Additionally, the arms should jut out slightly.
Bed
- Version 1

You are now ready to start creating the mattress and pillows. The mattress is simple a section of KAPAline that has had its edges sanded down to give it a slight curve. The pillows follow the same process but with a much greater curve and a much smaller size. The bed is then covered with a material of your choosing.
Top Tip! When creating furniture it is often much better to create combined legs rather than attempting to stick on individual ones!
 |
| Reference Image 2 |
 |
| Reference Image 1. |
Another way I have found to make a bed makes use of KAPAline foamboard, tissue paper and mountboard. A range of different headboards are easily swapped in but I decided on a quick triangular one to keep the set simple. One problem with the example below is that i failed to take the width of the KAPAline into consideration. This meant that both the toe and head board come off as slightly more unnatural looking.
To create the bed, the legs and base are cut out first. The shape of the base is traced onto some KAPAline, which is then cut out and sanded down to size. The pillows are cut out to the required dimensions and are once again sanded down to size.


No comments:
Post a Comment